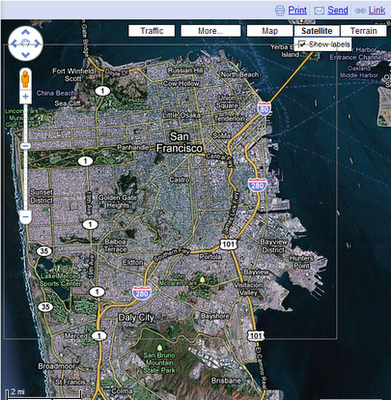
In addition, you can use Google Map Buddy to create large, continuous digital images from Google Maps, which make excellent desktop wallpapers. We'll show you how to do both in our Google Map Buddy how-to.
To use Google Map Buddy, follow these three steps:
1. Download Google Map Buddy
To get started, download Google Map Buddy at http://www.augmentedrealitysoftware.co.uk/gmb.html. You don’t need to install it, just unzip it and run the progam.
2. Generate Your Map Files
The first thing you'll see is a toolbar that prompts you to go to Google Maps. Click this button, then hit "Go" after selecting your country, and Google Map Buddy will open Google Maps in its own browser.
Using this browser, find an area you would like to map, and hit the "Select Area” button. This will allow you to draw a rectangle around the area you would like to include in your map. If, after you've already select an area, you decided you'd like to move around the map again, click on the New Location button, which will allow you to start over.
Once you’ve selected your map’s area, a drop down menu will appear, prompting you to select a zoom level. In the upper right corner of the program, you’ll see an additional zoom level number that corresponds with how zoomed in you are in Google maps. The zoom number that you pick must be larger than the zoom number displayed in the upper right, and the greater the difference between the two, the larger your printable map will be.
More specifically, the number you specify in the dropdown menu, is the zoom level that you want map buddy to capture it's images at.
Thus, if you make your selection at zoom level 10, and you tell it to capture images at zoom level 12, it will capture all the images from two zoom levels in that are required to fill up the area you selected. If you're still a little fuzzy about how that works, you can hit the Draw Helper button, which will draw a grid, showing you each of the zoomed-in images that Google Map Buddy will stitch together. In practical terms, the number of printed pages goes up exponentially as the difference in zoom levels increases, so start small and work your way up.
Finally, select "Create Map Image." Map Buddy will prompt you to save the map image as a series of map tile .png files, and one large, stitched-together composite image. Be sure to create a folder for your map, because depending on the zoom level, you may end up with a lot of map tiles.
Once you've named and saved your file, Map Buddy will prompt you to select the maps you wish to download. You can choose Road Map, Satellite, Terrain, or Hybrid.
If you’re planning to print out a map for your car, for instance, a road map will suffice. So, check "will be downloaded" next to road map, and select "ok." Map Buddy will ask if you want to delete the individual map tiles in your output folder. If you want to print out the individual images and tape them together, select no. If you want to create a large digital image, for a wallpaper for instance, you can select yes.
3. Print Your Map
Finally, you’re ready to print out all the individual map tiles. (Image 3) Since most printers can’t print all the way to the edge of the page, you’ll need some way to trim off the white borders around the side before you tape the sheets together, such as a paper cutter or razor blade and a straight edge.


Comments
Post a Comment